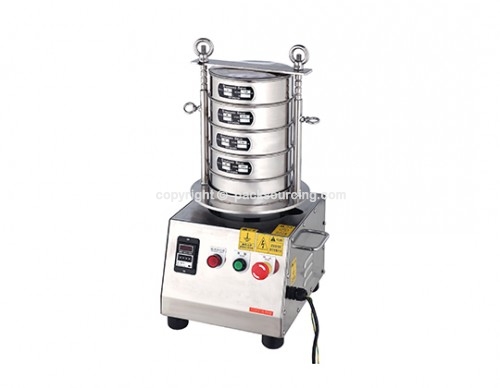
Testing Separator
GY - 200
Directions 1
♦Prior to operate the separator, ensure all the components are fastened, no broken on the sieves, no damage on the machine body, electrical cables are connected properly ( do not use a knife switch ), and three phase power supply is ready.
♦Please check whether the machine model and specification are the same as your order. Power supply is the same as shown on the machine plaque. ( Tolerance for voltage is + / - 10 % )
Preparation
♦Place screen pots with required mesh onto the machine base sequentially.
♦Feed raw material on the top screen pot, and then close the lid.
♦Adjust the height of telescope poles accordingly and fasten the telescope knobs. Tighten the two black screen pot holding knobs to secure the lid.
Operation
♦When power supply is on, the red power indicator comes on.
♦Set the timer ( between 0 – 30 minutes ).
♦Switch the start button, the green indicator comes on and machine starts working until the setting timing is up.
Maintenance
♦Turn off power supply when the machine is not in use for an extended period of time.
♦Clean the screen pots after operation, so they will be ready for use next time.
♦Do not splash water on the machine to avoid current leakage.
♦Turn the machine off immediately in the event of unusual noises and inspect for blockage or other irregularities.
♦Always ensure the black knobs are securely tightened before operation.
Directions 2
♦Check the electrical components and all moving parts regularly during operation. Adjust if needed.
♦This machine is guaranteed for one year under normal operating condition. Please contact our offices or distributors should any irregularity arise during the one-year warranty period. Do not under any circumstances attempt to make any repairs or replacements.
Configuration
♦Screen pot holding knob
♦Telescope pole
♦Screen pot
♦Ventilation hole
♦Shock absorption rubber
♦Power
♦Telescope knob
♦Machine base
♦Timer
♦Power
♦Indicator